Mato can turn a podcast episode into a batch of short video clips ready for TikTok, Reels, and Shorts. You can also start from a text prompt if you want clips that are not tied to a specific episode. This guide covers the full process: picking your source, configuring the output, tracking generation progress, previewing, styling, and downloading the finished videos.
Open the clip creation wizard
In your team workspace, click Social Content in the left sidebar. This opens the Social Content hub, which lists all your previous clip batches.
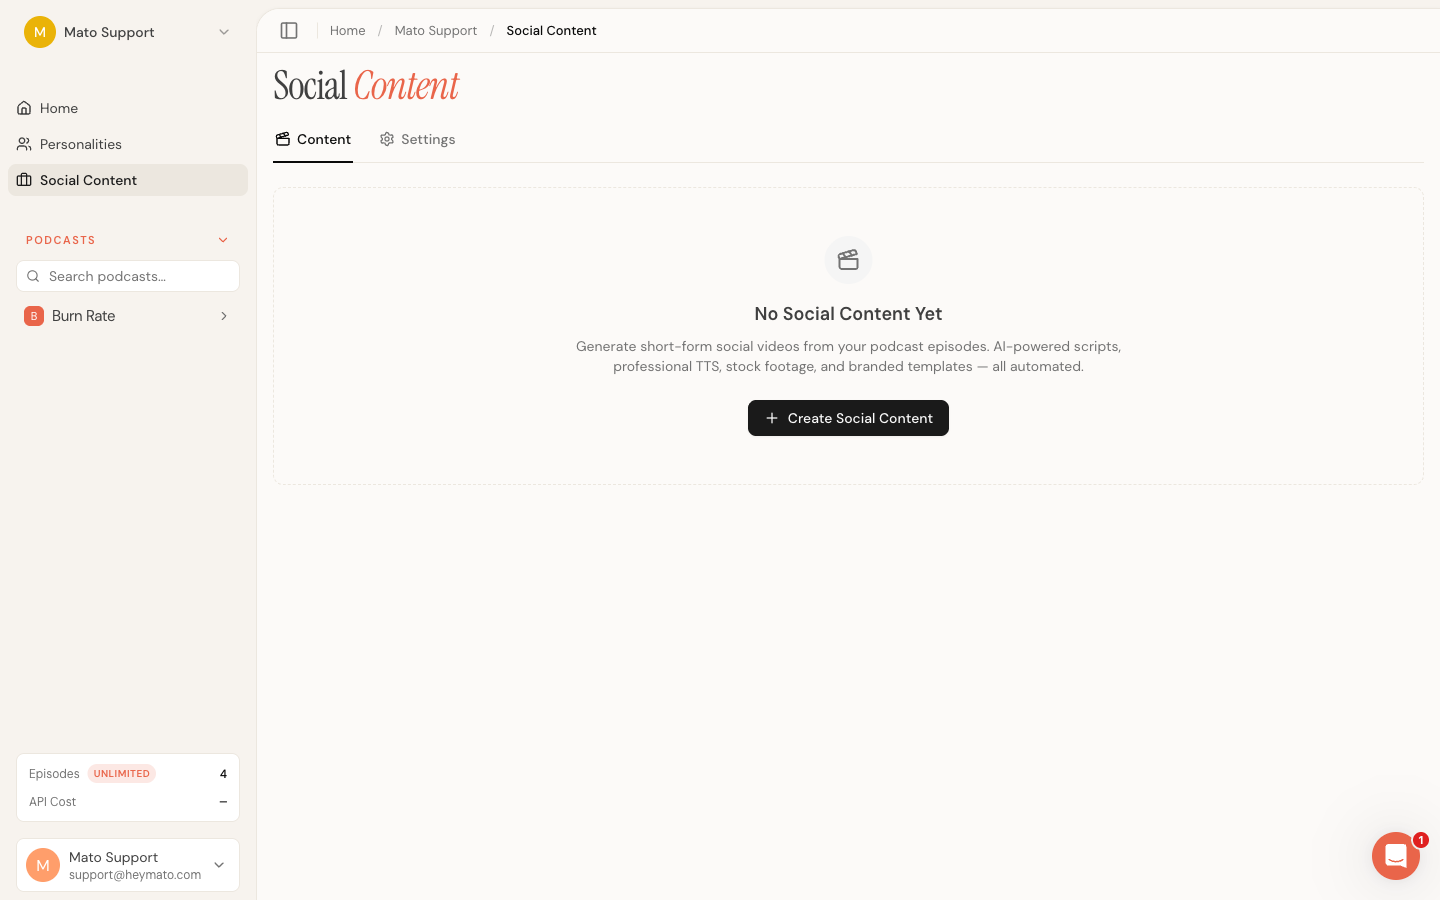
Click Create Social Content in the top-right corner to open the creation wizard. You can also reach the wizard directly from an episode detail page (the link pre-fills the episode for you).
Step 1: Choose a content source
The wizard starts with two source options:
- From Podcast takes an existing episode and extracts the most engaging moments from the script. This is the most common path.
- From Prompt lets you describe an idea in plain text. Mato generates clips from scratch based on your description. No episode required.

Select one, then click Continue.
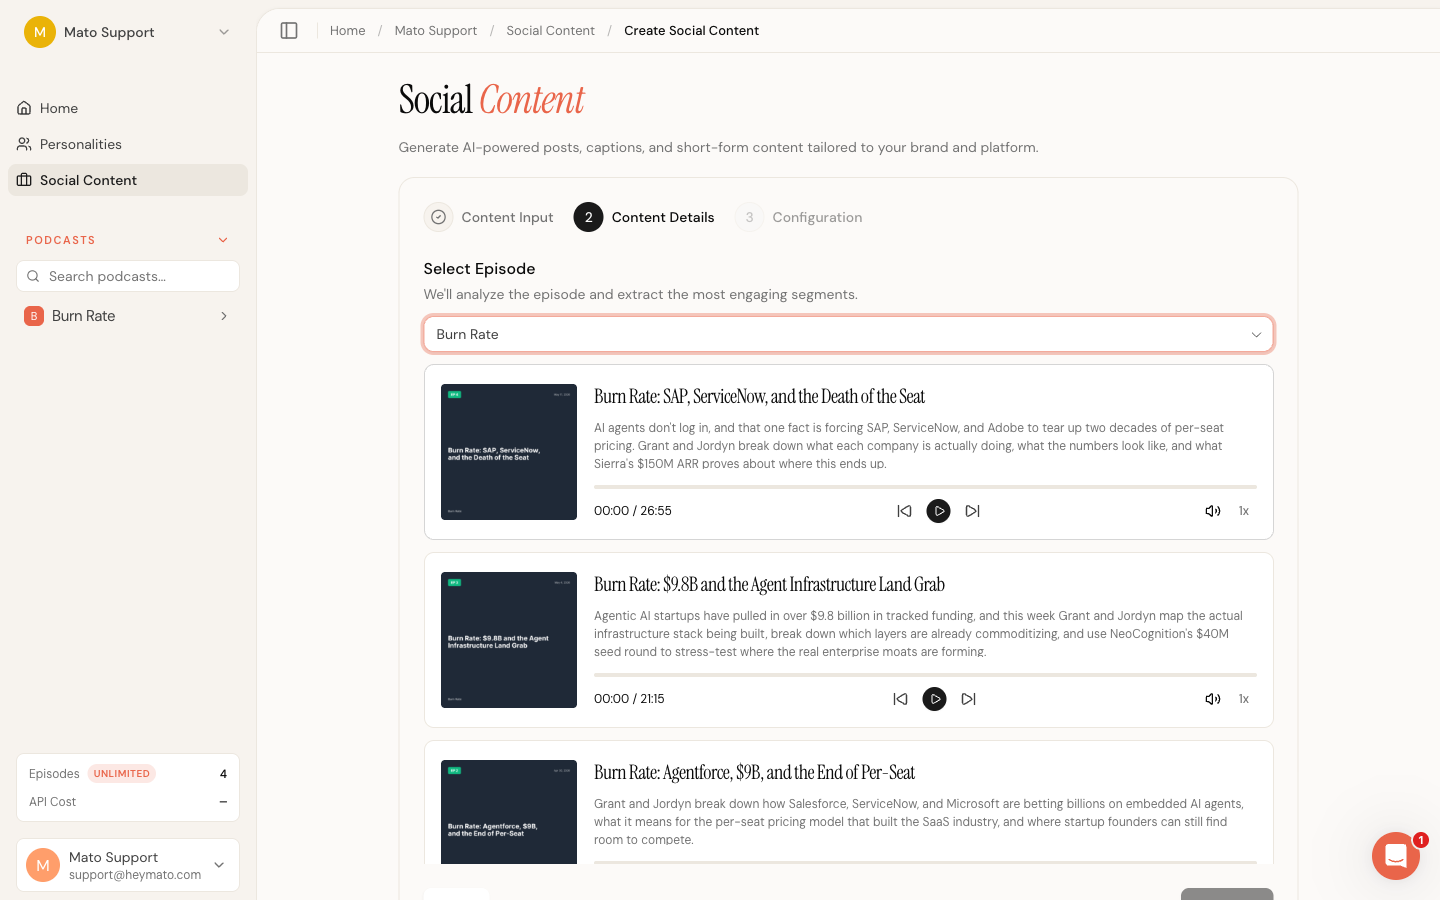
Step 2: Provide content details
What you see here depends on the source you picked.
Episode source
Pick a podcast from the dropdown, then select an episode from the list below it. Each episode card shows the title, publish date, and duration. Click the card to select it.
If no episodes appear, the selected podcast has no generated episodes yet. Go back and produce an episode first, or switch to prompt mode.
Prompt source
Type a description of the content you want (minimum 10 characters, maximum 500). Be specific about the topic, target audience, and tone you are going for. A vague prompt produces vague clips.
Example: "Three tips for SaaS founders launching their first podcast, aimed at LinkedIn, professional but conversational."
Click Continue once you have an episode selected or a prompt written.
Step 3: Configure the clips
This step controls how the clips look and sound.
Aspect ratio
Choose one or more formats:
- 9:16 (vertical) for TikTok, Instagram Reels, and YouTube Shorts. This is the default and covers the widest range of platforms.
- 1:1 (square) for Instagram feed and LinkedIn posts.
- 16:9 (landscape) for YouTube and Twitter/X.
If you select multiple formats, Mato picks the best ratio for each clip in the batch. You must keep at least one selected.
Clips
Use the slider to set how many clips to generate (1 to 7). Each clip focuses on a different key moment or idea from your content. Four clips is a good starting point for most episodes.
Brand
If you have brands set up in your workspace, select one here. The brand applies your logo, color palette, and typography to the generated videos. Leave it on Auto to let Mato pull brand settings from the linked podcast (if any).
Template
Templates control the visual style of the video. The options are:
- Auto lets Mato choose the best template for each clip based on content, mood, and pacing.
- Podcast Promo shows cover art and branded overlays.
- Viral Short uses b-roll footage with animated captions.
- Quote Card highlights a single quote or insight.
- Insight Minimalist strips the visuals down to clean text on a simple background.
- Audiogram Pro pairs the audio waveform with timed captions.
- Cliffhanger Teaser builds suspense with pacing-driven reveals.
- UGC Style mimics user-generated content for a casual, raw feel.
Click a template card to lock in that style for every clip. Click it again to deselect and return to Auto.
Advanced settings
Below the template grid, expand Advanced Settings for three more controls:
- Voice selects the TTS voice for the clip audio. By default, Mato uses the primary host voice from the linked podcast. You can override it with any Gemini voice from the dropdown.
- Max Duration sets the upper time limit per clip: 10, 15, 30, 45, 60, or 90 seconds.
- Tempo adjusts speech speed and content density on a scale from 0.5x to 2.0x. Higher values produce faster-paced clips with more content packed into the same duration.
When everything looks right, click Generate Content. Generation starts immediately with no confirmation step.
Track generation progress
After you click generate, the wizard moves to the progress screen. A progress bar and a list of pipeline steps show you where Mato is in the process:
- Generating scripts
- Creating voiceover audio
- Generating captions
- Finding stock footage
- Selecting background music
- Assembling video compositions
- Rendering videos
- Finalizing
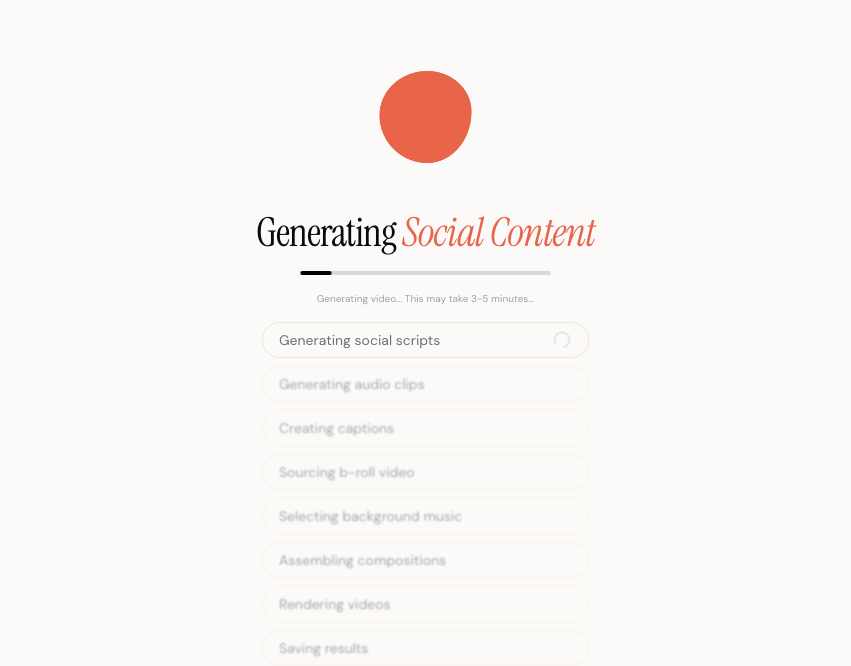
Each step shows a spinner while active and a green checkmark when done. Generation typically takes 3 to 5 minutes depending on clip count and duration.
If generation fails, the screen shows an error message and a Try Again button. Click it to return to the configuration step with your settings intact.
When all steps complete, Mato automatically redirects you to the batch editor.
Review clips in the batch editor
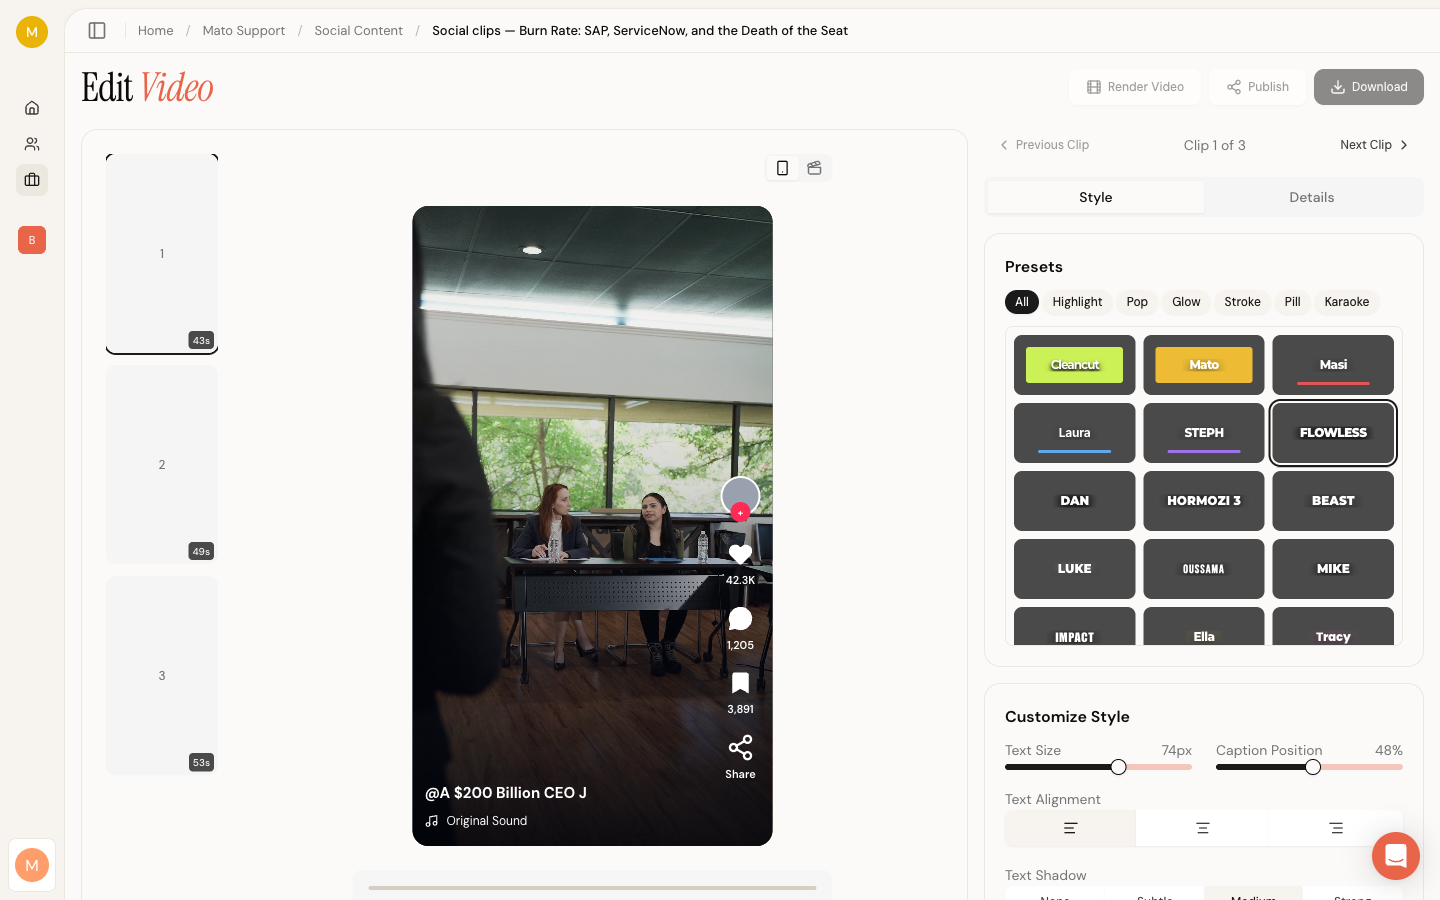
The batch editor opens with three areas side by side:
- A filmstrip on the left showing thumbnail previews of each clip in the batch.
- A video preview in the center where you can play the selected clip.
- A style panel on the right with tabs for styling and clip details.
Click any thumbnail in the filmstrip to switch to that clip. The preview and style panel update to reflect the selected clip. Each thumbnail shows the clip's duration in the bottom-right corner, and a publish status indicator in the top-left if the clip has been published to any platform.
Preview the video
The center area renders a live Remotion preview of the clip. You can play, pause, and scrub through the video using the transport controls below the preview. A preview mode toggle in the top-right lets you switch between:
- Phone view, which overlays TikTok-style UI elements (like, comment, share buttons) on the video to show how the clip will look on mobile.
- Plain view, which shows the raw video without any platform chrome.
Suggested caption
Below the video preview, Mato displays an AI-generated social media caption for the clip. You can copy it with the clipboard button, or click the regenerate button to get a new one.
Customize clip style
The right panel has two tabs: Style and Details.
Style tab
The Style tab has two cards:
Presets shows a grid of visual preset options specific to the clip's template. Click a preset to apply it instantly. The video preview updates in real time.
Customize gives you fine-grained control over colors, typography, and layout. The available controls depend on the template, but common options include:
- Caption font size and vertical position
- Accent, primary, and highlight colors
- Caption text color and shadow
- Font family
- Background style (gradient, blur, or solid)
- Light leak effects (toggle, opacity, hue shift)
- Animation style for the hook text
- Toggle for emojis and header display
After adjusting styles, click Save Style to persist your changes. The Reset button reverts to the original generated style.
Details tab
The Details tab shows metadata about the clip: title, hook text, script, mood, pacing, template, aspect ratio, duration, and CTA text. It also shows the clip's render and publish status.
Render and download
The action buttons sit in the top-right corner of the batch editor page:
- Render Video (or Re-render Video if the clip already has a rendered video) opens a progress modal that sends the clip to the rendering pipeline. Rendering takes 30 seconds to 2 minutes per clip. A progress bar tracks the percentage, and you can close the modal without interrupting the render.
- Download saves the rendered MP4 to your computer. This button is only active after a successful render.
- Publish opens the publish modal for distributing the clip to connected social accounts. This is covered in a separate article.
If you made style changes since the last render, you need to re-render to apply them. Mato saves the style automatically before starting the new render so the output matches what you see in the preview.
When the render finishes, the modal shows the rendered video with playback controls and a download button.
If the render fails, the modal shows an error message with a Retry button. Click it to try again without leaving the editor.
Clip and batch statuses
Both individual clips and batches have status indicators:
| Status | Meaning |
|---|---|
| Pending | Created but not yet processed |
| Generating | Pipeline is actively working on it |
| Ready | All processing complete, video available |
| Partial | Some clips in the batch finished, others failed |
| Failed | Processing hit an error |
On the Social Content hub, each batch card shows a status badge, clip count, creation date, and a mosaic of clip thumbnails. Click any card to open its batch editor.
What to do next
After creating and downloading your clips:
- Publish clips to connected social accounts from the editor.
- Customize templates and styles to fine-tune the visual look before rendering.
- Connect social accounts in Social Content settings to enable one-click publishing.
- Create another batch from the Social Content hub to cover a different episode or topic.