Every Mato workspace supports multiple team members. You can invite collaborators by email, assign them a role, and manage invitations from the Members page. This guide covers the full invite flow, from sending an invitation to what your teammate sees when they accept it.
Who can invite members
Both Owners and Members can send invites by default. If you can see the Invite Members button on the Members page, you have permission to invite people.
You can only invite people to a role at your own level or below. An Owner can invite someone as an Owner or Member. A Member can invite other Members but cannot grant the Owner role.
Send an invitation
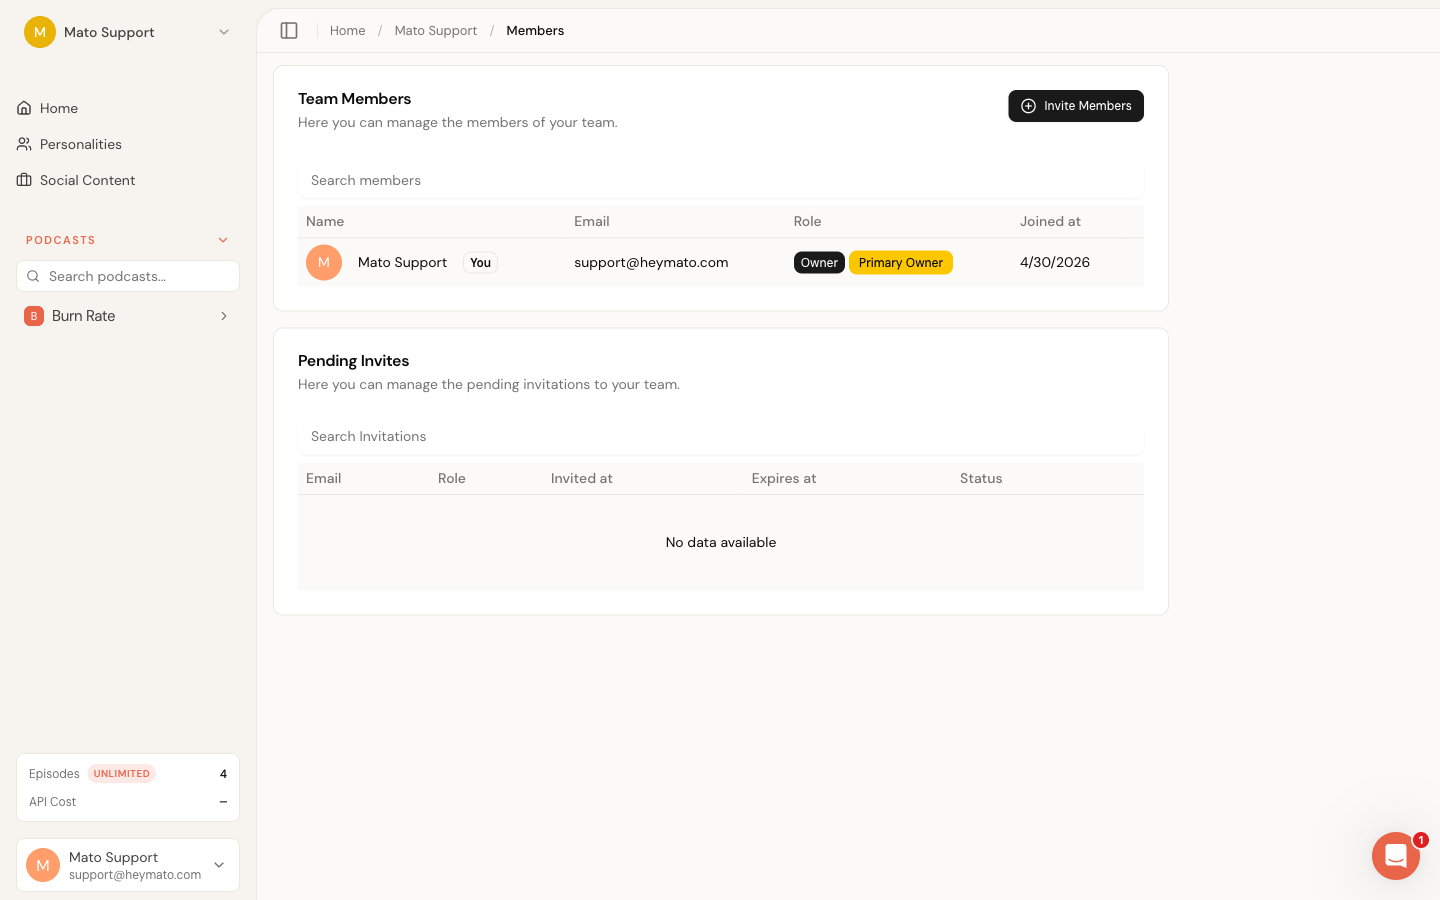
Open your workspace and click Members in the left sidebar. The Members page has two sections: the current members list at the top, and pending invitations below it.
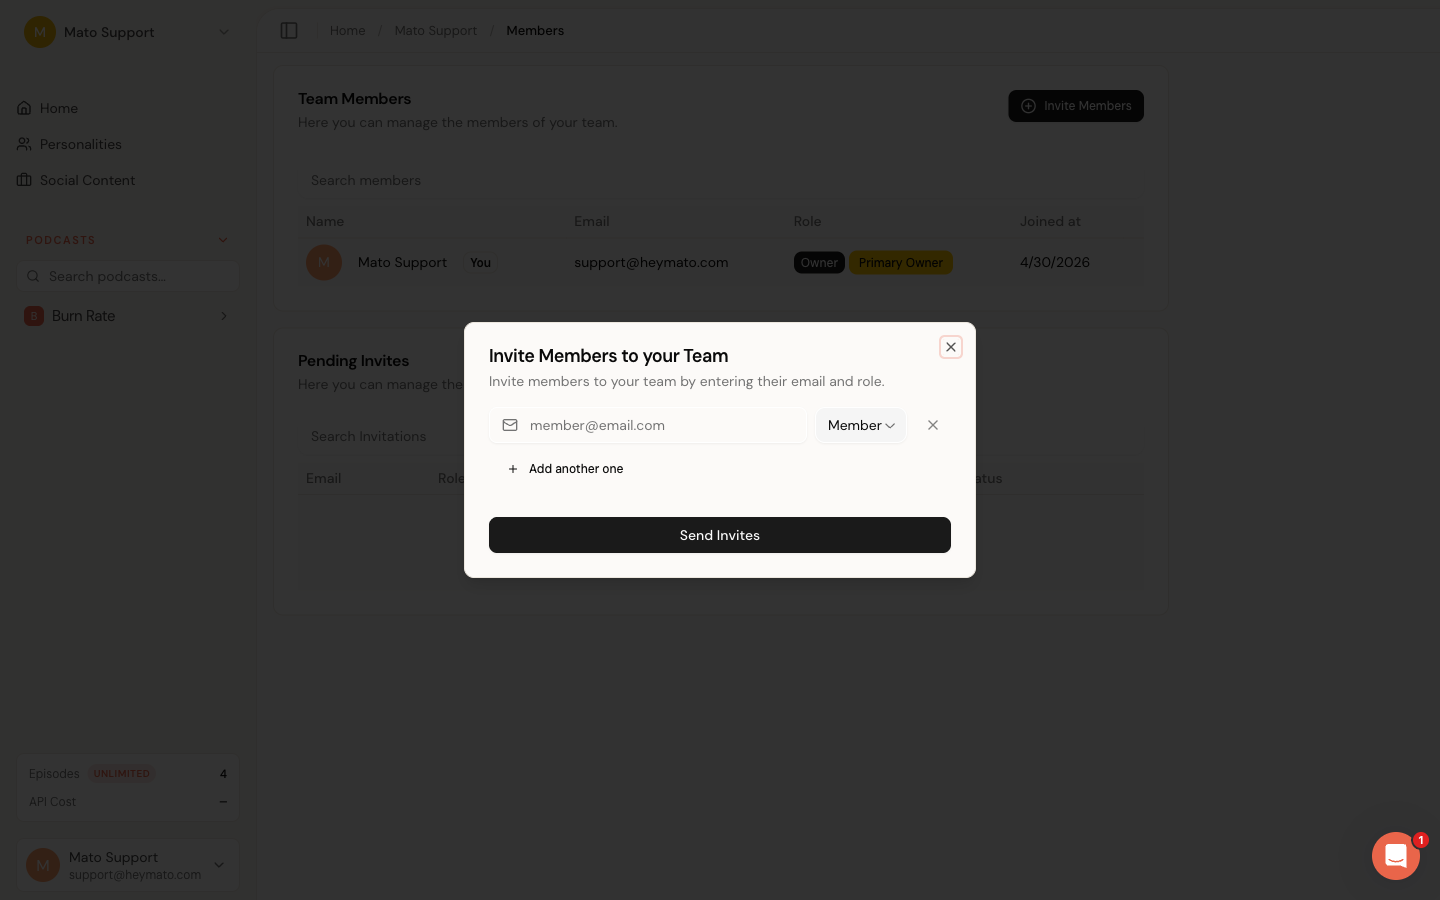
Click Invite Members in the top-right corner of the members card. A dialog opens with a single email row pre-filled.
For each person you want to invite:
- Type their email address in the email field.
- Pick a role from the dropdown next to the email field. The default is Member.
- To add another person, click Add another one. You can send up to five invitations at once.
- To remove a row, click the X button to its right.
- When you are ready, click Send Invites.
Mato validates that no duplicate emails are in the batch and that the invited person is not already a member of the workspace. If validation passes, each invitee receives an email with a link to join your team.
Understand roles
Mato workspaces have two built-in roles:
| Role | What they can do |
|---|---|
| Owner | Full access. Manage billing, workspace settings, roles, members, and invitations. |
| Member | Manage workspace settings and invitations. Cannot change billing or assign roles. |
One Owner is designated as the Primary Owner. The Primary Owner badge appears next to their name in the members table. Only the Primary Owner can transfer ownership or remove other Owners.
What the invitee sees
When you send an invitation, Mato emails the invitee with a link to join your workspace. The email shows who invited them and which team they are joining.
Clicking the link in the email takes the invitee through one of two paths:
- If they already have a Mato account, they are signed in automatically and see a confirmation page with the workspace name and a Continue as (email) button.
- If they do not have a Mato account, Mato creates an account for them and then shows the same confirmation page. New users may be asked to set up a password or other authentication method after joining, depending on your workspace's auth configuration.
After clicking the join button, the invitee lands in your workspace and appears in the members table.
If the invitee is signed in with a different email than the one that was invited, the confirmation page shows a Sign in with a different account option. They can sign out and sign back in with the correct email.
Manage pending invitations
The bottom section of the Members page lists all pending invitations. Each row shows the invitee's email, their assigned role, the date the invitation was sent, the expiration date, and a status badge (Active or Expired).
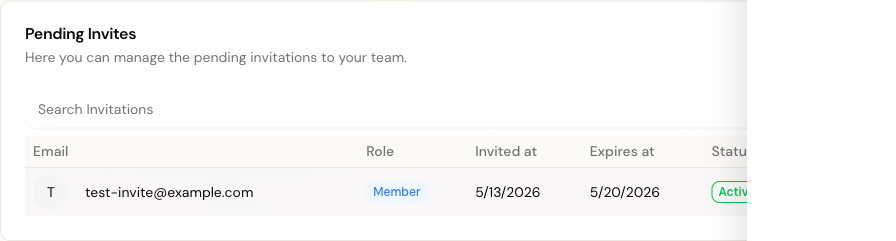
You can search pending invitations by email or role using the search field above the table.
Change the role on a pending invitation
Click the three-dot menu on the invitation row and select Update Invitation. A dialog opens where you can pick a new role. The change takes effect immediately, so if the invitee clicks their link later, they join with the updated role.
Renew an expired invitation
Invitations expire after seven days. When an invitation expires, its status badge changes from Active (green) to Expired (amber). The invitee can no longer use the link.
To resend the invitation, click the three-dot menu on the expired row and select Renew Invitation. This extends the expiration date by another seven days. The invitee does not receive a new email automatically, so you should let them know the link is active again.
Remove a pending invitation
Click the three-dot menu and select Remove Invitation. A confirmation dialog asks you to confirm. Once removed, the invitation link stops working and the invitee cannot join through it.
Billing and seats
There is no limit on the number of members per workspace. Invite as many teammates as you need. Launch and Business plans are limited to one team per account, while Network supports multiple teams.
A shareable join link that lets people request access without a direct email invitation is coming soon.
Troubleshooting
The Invite Members button is missing. Your workspace may not have an active subscription, or a billing policy may be blocking new invitations. Check your plan status on the Billing page.
The invitee says the link does not work. Invitation links expire after seven days. Check the Pending Invitations table for an Expired badge. If it is expired, renew the invitation from the three-dot menu.
The invitee already has a Mato account with a different email. The invitation is tied to the specific email address you entered. The invitee needs to sign in with that email to accept. If they prefer a different email, remove the pending invitation and send a new one to their preferred address.
"User already member of the team" error. The email address you entered belongs to someone who is already in your workspace. Check the members table to confirm. You cannot send a duplicate invitation.