Every Mato workspace is a team. The person who created it is the Owner, and everyone else joins as a Member. This guide covers how to view your team, invite people, change roles, remove members, and understand what each role can do.
Open the Members page
Click your workspace name in the top-left of the sidebar. In the dropdown, click Members. This opens the Members page, which shows two tables: current members and pending invitations.
You can also reach Members from the sidebar dropdown alongside Settings and Billing.
Understand roles
Mato has two built-in roles: Owner and Member. Each role comes with a set of permissions that control what a person can do inside the workspace.
| Permission | Owner | Member |
|---|---|---|
| Manage roles (change other members' roles) | Yes | No |
| Manage billing (view invoices, change plan) | Yes | No |
| Manage members (add or remove people) | Yes | No |
| Manage settings (rename workspace, update logo) | Yes | Yes |
| Manage invitations (invite, revoke, renew) | Yes | Yes |
Roles use a hierarchy. Owners sit at level 1, members at level 2. You can only change the role of someone at a lower level than yours (higher number). This means a member cannot change another member's role, and nobody can change the owner's role from the Members page.
Primary owner
One person in every workspace is the primary owner. This is the person who created the team. The primary owner has a yellow "Primary Owner" badge next to their name in the members table.
The primary owner cannot be removed from the workspace. They are the only person who can transfer ownership or delete the workspace entirely.
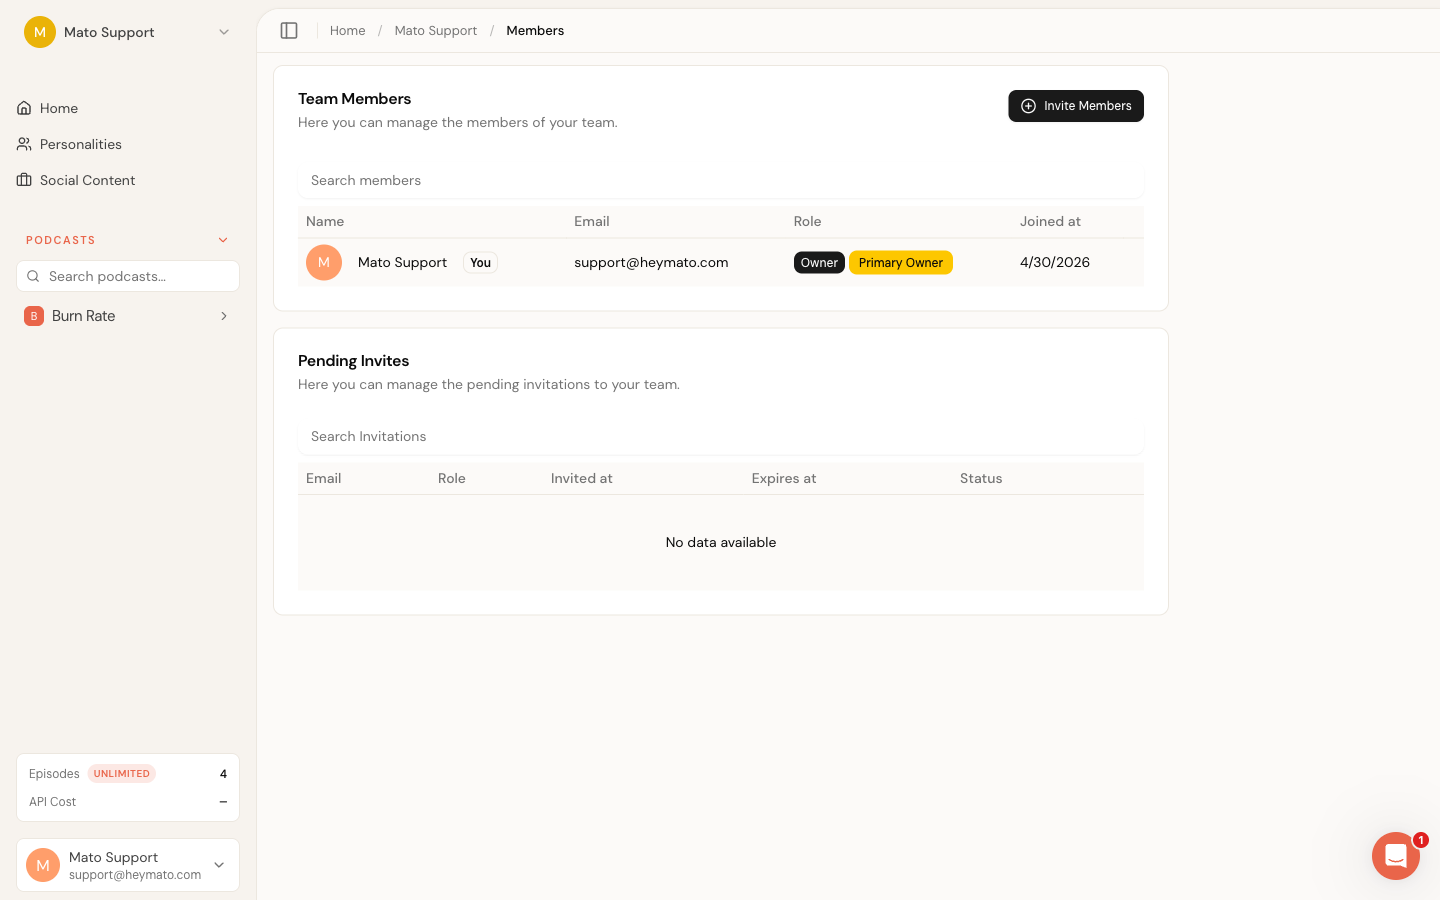
View team members
The members table shows each person's name (or email prefix if they have not set a display name), email address, role, and the date they joined. Your own row is marked with a "You" badge.
Use the search field above the table to filter by name or role. Members are sorted by role hierarchy, with owners listed first.
Invite new members
If you have the invite permission (owners and members both do), you can add people to the workspace.
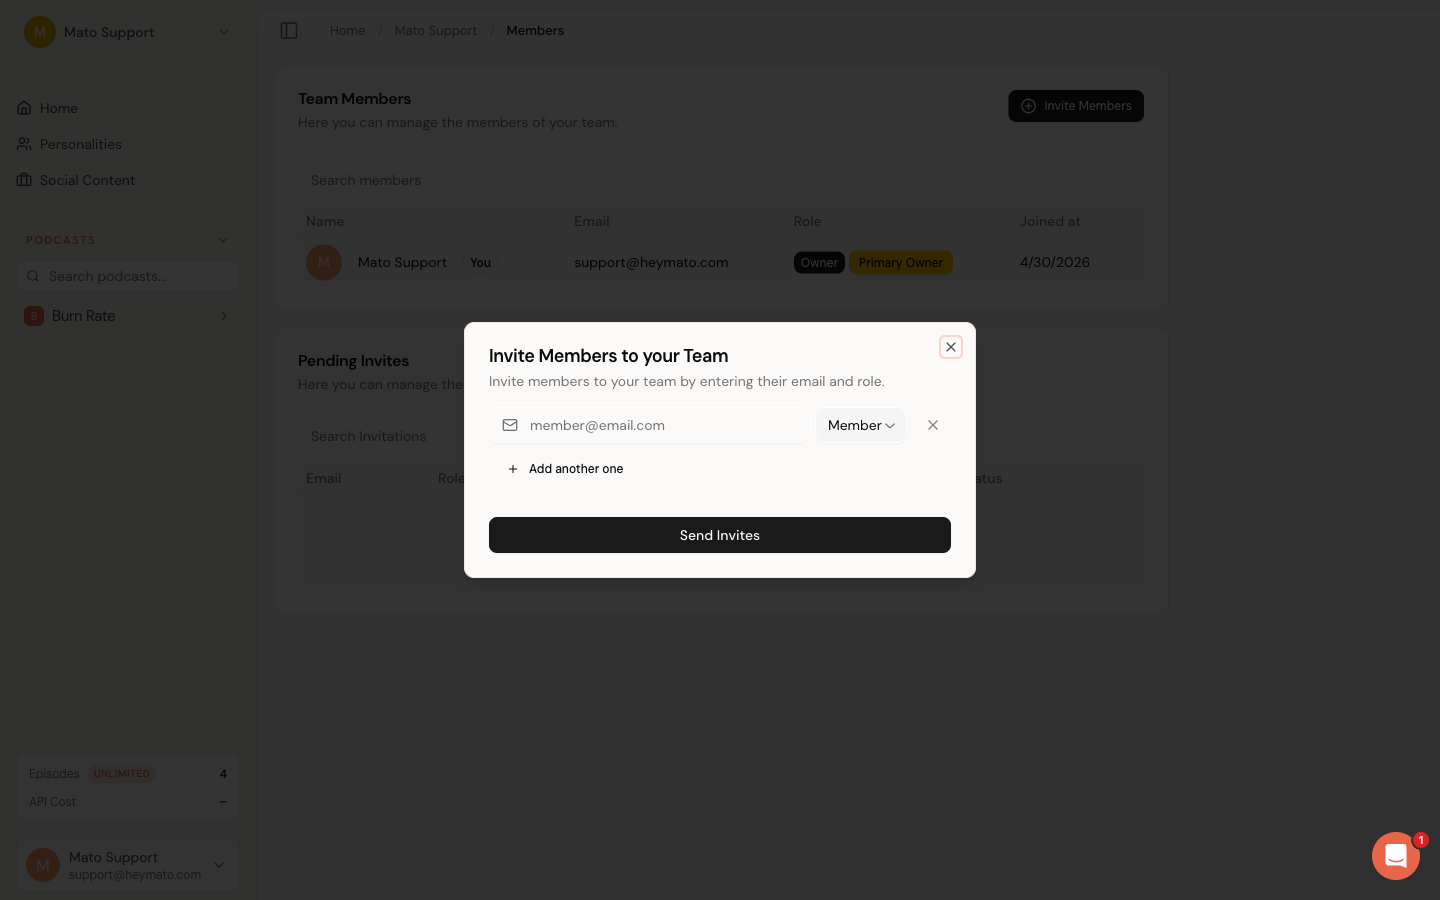
- On the Members page, click Invite members in the top-right corner.
- Mato checks your workspace policies (plan limits, seat availability). If the check passes, the invite form opens.
- Enter an email address and pick a role from the dropdown. The role selector only shows roles at your level or below, so a member cannot invite someone as an owner.
- To invite multiple people at once, click Add another one below the first row. You can send up to five invitations in one batch.
- Click Send Invites to send the invitations.
Each invited person receives an email with a link to accept. Until they accept, they appear in the Pending Invitations table below the members list.
Manage pending invitations
The pending invitations table shows each invite's email, assigned role, sent date, expiry date, and status (Active or Expired).
For each pending invitation, you can:
- Update the assigned role before the person accepts
- Renew an expired invitation (extends the expiration by seven days; no new email is sent)
- Remove the invitation entirely
Click the three-dot menu on an invitation row to see these options.
Change a member's role
- Find the person in the members table.
- Click the three-dot menu at the end of their row.
- Select Update Role.
- In the dialog, pick a new role from the dropdown and confirm.
You can only change roles for people below your hierarchy level. If you are a member, the three-dot menu does not appear for other members. The primary owner can change anyone's role.
The role selector filters out the person's current role so you cannot "update" them to the same role they already have.
Remove a member
- Find the person in the members table.
- Click the three-dot menu at the end of their row.
- Select Remove from Account.
- Confirm the removal in the dialog that appears.
The same hierarchy rule applies: you can only remove people below your level. The primary owner cannot be removed. If you want to leave the workspace yourself, go to Settings instead (see "Leave or delete a workspace" below).
Transfer ownership
Only the primary owner sees the Transfer Ownership option in the three-dot menu. Transferring ownership is a sensitive action, so Mato sends a one-time verification code to your email before proceeding.
- Click the three-dot menu next to the member you want to promote.
- Select Transfer Ownership.
- Enter the verification code from your email.
- Confirm the transfer.
After the transfer, the other person becomes the primary owner and you keep your current role. This cannot be undone from the Members page; the new owner would need to transfer it back.
Leave or delete a workspace
These options live on the Settings page, not the Members page.
If you are the primary owner and team deletion is enabled, the Settings page shows a Delete team button inside a red Danger Zone card. Deleting a workspace removes all podcasts, episodes, and data permanently. Mato requires email verification before processing the deletion.
If you are not the primary owner, the Danger Zone card shows a Leave team button instead. Type LEAVE in the confirmation field to proceed. Once you leave, you lose access to the workspace immediately.
Team billing relationship
Billing is tied to the workspace, not to individual members. The subscription, plan, and payment method belong to the team account. Only owners can view invoices, change the plan, or update payment details.
There is no limit on the number of members you can add to a workspace. However, Launch and Business plans are limited to one team per account. The Network plan supports multiple teams.
To manage billing, click your workspace name in the sidebar and select Billing, or navigate to your workspace's billing page directly.